
How To Paint French Provincial Furniture A Perfect White
White is one of the most popular paint choices for painted furniture as it creates an atmosphere that is both soothing and tranquil.
In particular, you are seeing a lot of French provincial furniture pieces painted in white.
Here is how you can update that second hand find into something amazing.
- Create a surface that paint can stick to.
Sanding is a good step if you don’t want your paint to chip. In the past I have messed up paint finishes by sanding with too coarse of sandpaper. This usually appears with swirl marks in the paint finish. If this happens, carefully sand it with very fine sandpaper and add another layer of paint.
The trick to sanding is to just sand with fine sandpaper. Sand in the direction of the wooden grains, this way you won’t get noticeable swirl marks. DEWALT Sheet Sander, FOAM SANDER
How to paint over Melamine Tops, often seen with particular french pieces.
One of the most questions most people ask is how to paint over melamine tops. The simple answer is to sand it with a relatively fine sander. Apply a coat of flat white oil paint. Oil paint is extremely durable, and with the flat sheen it acts like a primer.
Third – Priming
Every primer is a bit different. Some primers can go to the garbage because they are so ineffective. With black or darker paint finishes, I would not recommend priming first with white or gray.
Rust-oleum Black Primer Pack of 6
One of my mistakes when I first started painting was using a light colored primer under my dark painted finishes. It looked terrible when it came to distressing the furniture.
I reached out to many painters to tell me their secrets of great distressing and I found very few that would help me with this problem, until one day I just decided to sand more and toss away the primer and It worked!
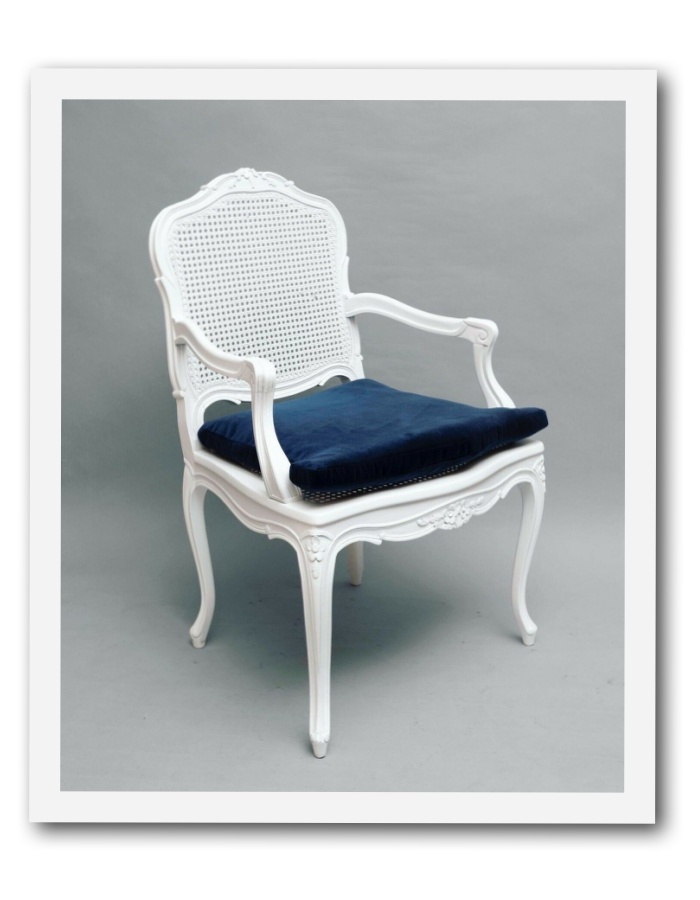
French Provincial Chair From magichill307 On Ebay
Black flat oil paint works terrific as a primer.
There are situations where priming is a necessity. One of these instances is painting walls. You need to start with a primer. Priming can give you a very good base for any color you plan on using especially if you are painting over wood which sometimes can be especially hard to cover well.
![]() For the longest time, my favorite primer was Gripper as it is a fantastic primer. I first used it to seal a floor that was being painted white in an apartment building. It held up on apartment floors that dozens of people would walk on daily. I figured that if it held up on the floors it would do just as great of a job on furniture.
For the longest time, my favorite primer was Gripper as it is a fantastic primer. I first used it to seal a floor that was being painted white in an apartment building. It held up on apartment floors that dozens of people would walk on daily. I figured that if it held up on the floors it would do just as great of a job on furniture.
Kilz is another very popular primer. Some people think it is one of the best primers out on the market. If you do use this brand, consider the spray paint primer…..Kilz Original Primer Spray Paint. The oil primer is especially thick and very hard to manipulate and I found it very gloppy and extremely hard to work with. I have not tried their water-based version, so please don’t discount this brand all together.
When I moved out to Seattle, I shopped at Ace Hardware more often, and found their Ace Brand Name projects are high quality. Not only are their paint colors beautiful, but I have been able to try out some new brands I wouldn’t have otherwise tried.
 My biggest secret is a primer I found through Ace, but can be ordered on Amazon or at Home Depot which is called Cover Stain By Zinsser in the oil paint. You can buy this at Home Depot and almost every Hardware Store. The best part of this oil paint is that it is TINTABLE!
Coverstain Primer that is tintable
High Hide Odorless Oil Primer without Sanding – Odorless Primer
*The most surprising thing is that their oil-based primer is thin rather than thick, and it goes on like butter. Considering it is an oil paint, that is rather surprise. I prefer to work with oil because it sticks to everything, and it is quite durable.
Again when I started out painting, my paint would chip easily, which lead me to oil paint finishes as a primer.
*As the paint dries, your brush strokes are evened out.
*In addition, the paint dries rather quickly. It can be dry within 3 hours, which you can apply another coat. By the next day you can sand, and it sands especially easy compared to any other brand.
*This oil paint has teeth! It grips to almost anything without being scratched.
*Also, it is one of the ONLY oil paints that dries to a matte finish. I often add two coats of the primer, then I seal it with a Polycrylic water-based sealer.
* It produces a perfect chalk paint finish. This OIL paint can be tinted most light colors which makes it a dream to work with. It has rejuvenated my passion for painting and I couldn’t be more excited to paint furniture right now.
My Secrets to Professional Finishes:
When a professional painter or woodworker looks at a piece of furniture often the first thing they look for is how even the paint finish is.
How do you achieve this?
A. You can spray your furniture with paint sprayers.
Often times it is not worth investing in a paint sprayer and a compressor just for one or two pieces of furniture that you plan on painting over time. If you are looking at painting furniture as a business, it would be a wise investment.
Another way of spraying furniture is simply to buy paint in a can. This usually works quite well for small projects such as chairs, picture frames or end tables, but it would get quite expensive for larger pieces.
B. Use a foam paint brush.
My friend Nancy in Virginia was the first to teach me this technique. She gets ALL the credit on this one!! These foam brushes can be found for every cheap at dollar stores or on amazon. They can also be found at home depot for a dollar or two. Although if you plan on painting furniture as a business, purchase them online or from a dollar store, as they tend to sell them in packs of 10 for only $1. They are cheap but every effective throw away foam brushes that even out your stokes. 30 Foam Paint Brush, Foam Roller Smooth
2. White, but not BLINDING white.
You almost never see higher end finishes using bright white paint, except for Hollywood regency styles which use glossy whites with modern looking pieces.
I tend to lean towards whites that are tinted towards the beige tones or green undertones as they are closer to the Swedish antique paint finishes. Your piece will look more antique than modern which then translates into being more expensive looking.
I do enjoy French grays, or really milky white grays rather than white, because it gives it an antique feel which is rich and doesn’t look freshly painted.
Some of my favorite colors are:
Martha Stewart- Sandpiper, Fossil, Bedford Gray, Heath, Mourning Dove, Ash Bark, Cityscape, Eiderdown, Tadpole Green, Flagstone
Ace Paints – Hazy Day, French Gray, Heartland, Tahoe, Ramie, Warm Scones, Navajo White, Wooden Spoon, Chinos, Gray Day
3. White Washing– White washing is a spectacular finish where the base coat is beige tones and a lighter color is added on top. I have found the best colors to work with are those with a brown undertone, such as beige, and adding a creamy white with yellow undertones on top. White washing is basically adding glaze for a translucent finish. Paint on the white paint with glaze, and and use a relatively dryer damp cloth and wipe off the cream paint, leaving a wash-like appearance. It produces a very nice effect.
4. Distressing– Distressing can add depth to your furniture giving it a very antique rustic appeal. You can distress with a hand electric sander, or a hand foam sander which gives more of a delicate worn feel over time than deliberate wear and tear would.
The key to distressing is to sand in areas where worn paint would appear over time. Locations such as the feet of furniture, sides, the wood around the handles are natural places furniture would wear over time. For heavy distressing take a few tools such as a hammer, screwdriver and a chain and rough up the surface of the piece. The more you rough up the surface the more aged the piece appears.
Adding crackle paint in some areas can give your furniture piece an antique feel. In addition, Porcelain Crackle Glaze can give a piece of furniture an aged look. The crackle makes it look as though the paint has changed through the years. How this crackle works is that you apply it to areas you wish to age. Let the paint dry completely, and rub in dark glaze or shoe polish, or brown glaze to expose the lines.
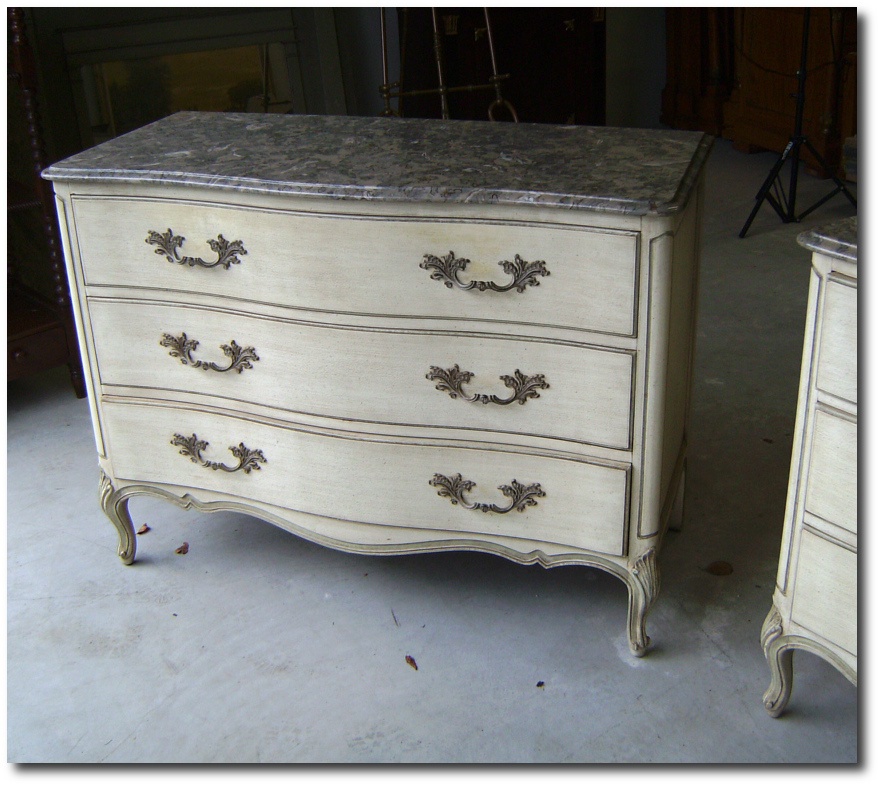
Henredon French Louis XV Style Marble Top Dressers
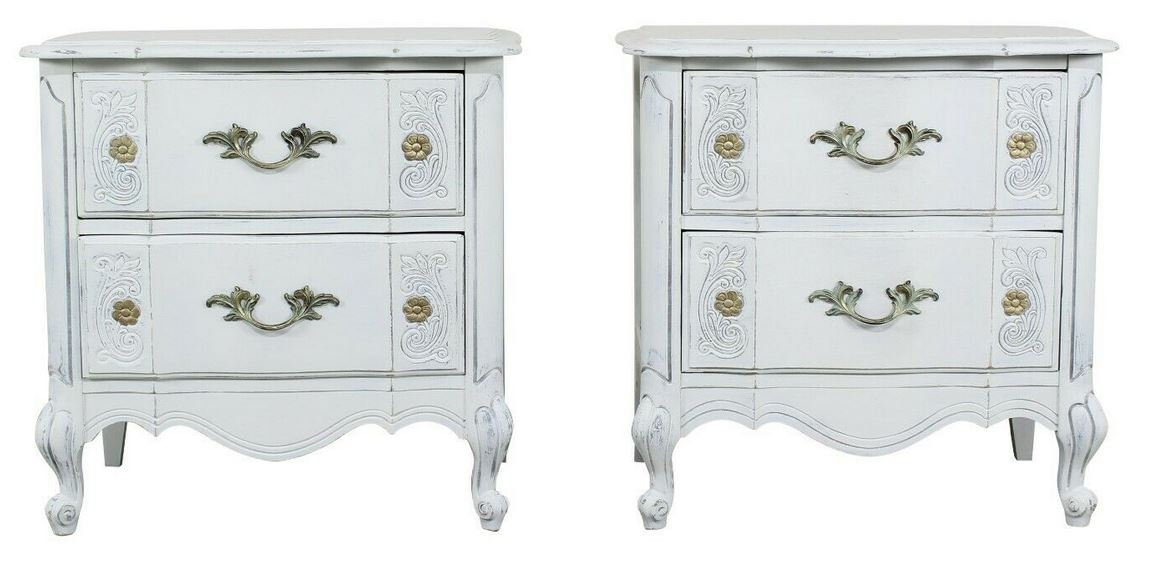
French Provincial – vintagebellahome on ebay
5. Glazing– A glaze is a translucent binder which less paint pigment is added to produce a look which is somewhat clear with a bit of color. You can buy glaze mixed together at your local hardware much like ordering paint, or you can buy glaze alone and mix in paint yourself.
 The incentive of buying the glaze without paint is you can then use the glaze with a number of other colors without buying a quart of each color you intend to use. It really comes in handy when you want to use different colors with different furniture.
Blend & Glaze Decorative Painting Liquid
Ralph Lauren Faux Technique Glaze
How I work with glaze is first to apply it with a chip brush and then take a rag which is slightly damp, (but more towards the dry side), and wipe it off, leaving a faint amount of glaze.
I have found in the past that it is important to really select your rags carefully. One time I used a black facecloth, and tiny pieces of the black fabric were left behind in the paint. A white tericloth face cloth doesn’t work well either. The best idea is to use old tee-shirt rags because they wouldn’t leave any traces of the fabric behind. Again, experiment and see what works best for you.
I hope I have inspired you to get your hands dirty and try new techniques. Have fun with your transformations. It is amazing what just a simple gallon of paint can do for your home and furniture. You don’t need to spend much to make a big impact.