How To Paint Furniture Black Like A PRO
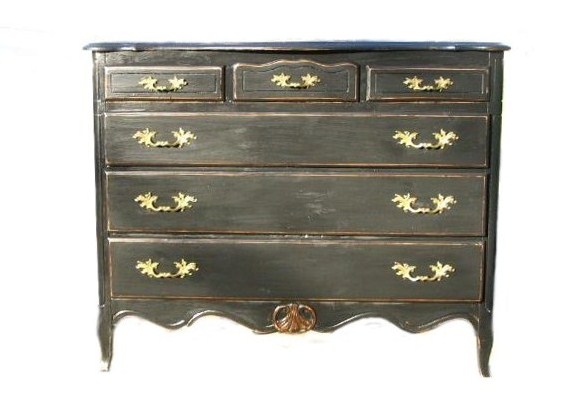
Gorgeous Black French Dresser From Cassie’s – Primitive and Proper
French provincial furniture has caught popularity with designers and decorators as the new Tuscan looks sweep the magazines. More decorators are getting resourceful transforming old vintage pieces that have the charm of high end looks, into the expensive antiques they see in the designer show rooms. Black has always been one of the most popular choices of the past and of today because it is a color that works with every other color of the color wheel. Black and white will always open up your choices for your walls, and fabrics compared to other colors.
Perhaps you are an experienced painter, and have transformed hundreds of pieces; we would love for you to leave your insights into painting tricks and tips of the trade.
If you are a new painter, I hope I can share some valuable tips that I have learned first hand over the years that I have painted furniture, and hopefully to encourage you in your next transformation of your plain dresser into something spectacular.
Anyone can paint a dresser black, but there are certain tricks to make your painted pieces higher end. When painting, your final product should look as though you didn’t do it at home.
Rustic painters prefer to see brush strokes, and in antiques you often see brush strokes, but one of the biggest tips I can pass on is that your piece is very smooth that it looks like a manufacture finish, or a higher end antique worth thousands. Part of achieving that finish is either using a spray, or using a foam brush which evens out your painting strokes.
Another way of adding to the overall finish is faux techniques most people do not know how to do, or even consider which we explain more below. Each of these steps will make your painted piece look as though you bought it at a high end shop, and antique gallery, or possibly pass as an antique.
1. Distressing
Distressing is a sure way of adding depth and interest to a dresser, table, or nightstand. When I first began painting, I always made sure I primed my furniture, because I wanted the paint to stick to the furniture I was finishing. I was afraid of the paint lifting off the furniture, so I always made sure I primed. As I experimented and advanced in my painting, I found I was pretty limited when it came to distressing because you cannot buy primer in black. Often times they could tint primer, and the best you could get was gray. Behr has come out with a paint and primer mixed together, but at that time I was pretty limited. Looking at all the distressed pieces out there, I couldn’t understand how many painters achieved the finish of distressing. It wasn’t until much later, (almost a year) that I just disregarded priming all together, and made sure my pieces were sanded well, so I could use my main color of paint instead of primer AND then paint. The options then started opening up for me.
Some of the vintage french provincial furniture have “baked on” white epoxy finishes that are almost impossible to remove with stripper, so in those instances, if you want a two-toned affect, you will need to prime your piece, and paint it red, and then finish it with a black coat. If you are an experienced painter, you could faux finish your piece in a wood color, and then go ahead and paint it black and distress it. This will give you the same effect of a wood piece painted black. This goes the same for melamine tops which are often seen on french provincial furniture. Be sure to really sand your melamine top before painting.
The trick to distressing is the sponge sanders found at your local hardware store. I have found using a sponge sander gives you the flexibility and control of where and how much you want when it comes to distressing. Using a hand electric sander can often take off A LOT of paint, which can force you to go back and repaint some of the areas. Using a hand electric sander might come in handy if you have several layers of oil paint that you want to expose. When it comes to regular latex paint, the paint is just too thin, it often takes off too much.
The art of distressing is to sand in the areas which would be worn. Sand under neath drawer handles, or on the feet of your chest where feet would bump over the years. Sand where items, bowls, vases would be placed on the tops of your buffets, or on the edges showing the beautiful lines of your furniture. Distressing is a sure way of breaking up the black and giving an interest that grabs the eye each time in passing.
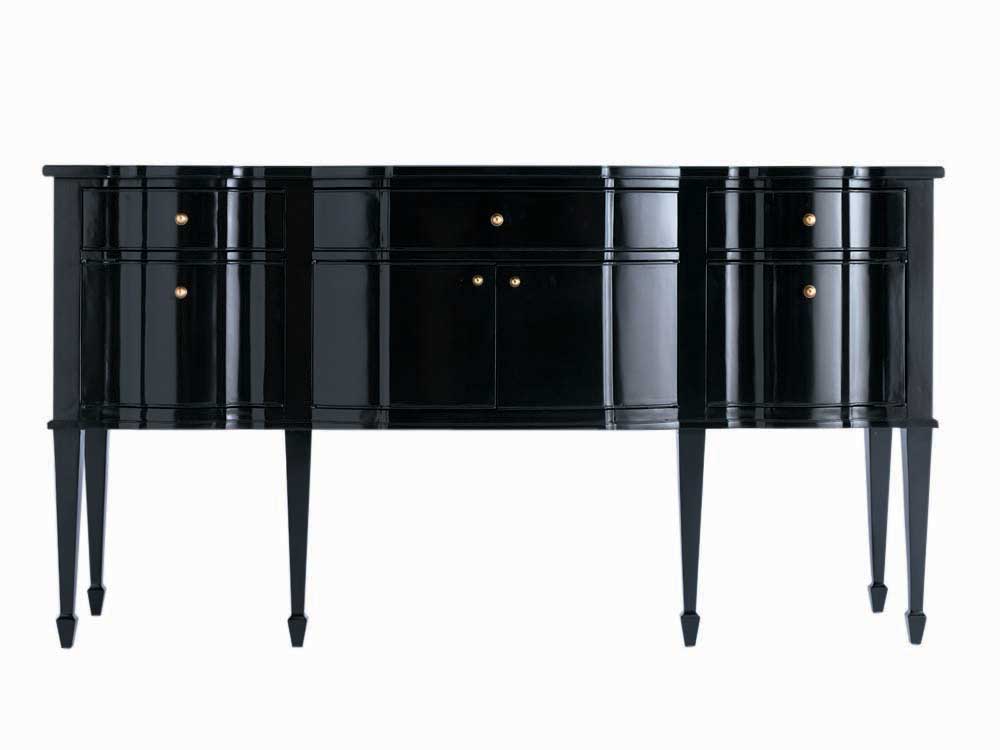
Martha Stewart Chinoiserie Sideboard
2. Glossy Black
Furniture will always be a high-end designer choice when it comes to furniture finishes. Glossy black paint always looks fantastic on curvy furniture such as french bombe chests or serpentine dressers. When it comes to gloss finishes, the biggest tip I can pass on is to be sure the furniture you are planning on transforming is without blemish. Glossy finishes will pick up every imperfection which is even more magnified when you use any type of gloss finish, so fine sanding is imperative if you choose to go this route. Spray painting could be the easiest option if you are doing a small project like a chair. If you are planning on doing a larger piece such as a buffet or dresser, use a sponge brush, which evens out each stroke. You may have to do 3 or 4 coats of paint, but your piece will be as even as a babies behind.
3. Faux Finishes
Faux finishes often has some sort of highlight in ornate details of the furniture. Often painters try to replicate this aged look by applying a beige or gray paint to bring out the beautiful depths of heavily carved furniture. With my experience, I highlighted an empire dresser that I painted black with a light gray paint in the areas it was carved. Over all, I wasn’t pleased with the look, because the gray painted areas looked too heavy and obvious it was paint than occurred over time with natural age. I washed it off and noticed that the watered down remnants of paint that were left, perfectly highlighted the areas leaving a aged look, pointing the eye to the more detailed parts of the chest. It did a remarkable job of making the dresser look more expensive than it was. If you do plan on trying out this technique, dilute your beige/gray paint with a glaze, and be sure to have a damp rag to remove the extra paint leaving very little behind as your highlight.
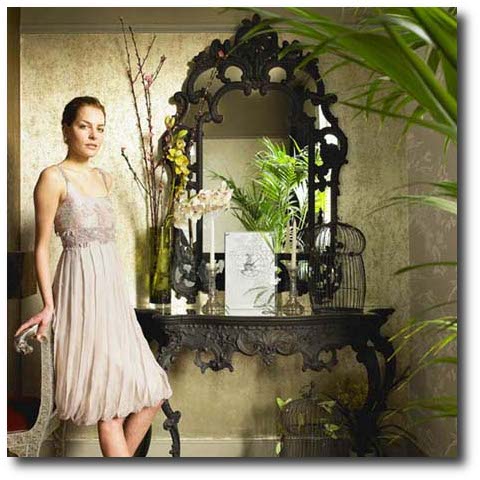 Graham And Green
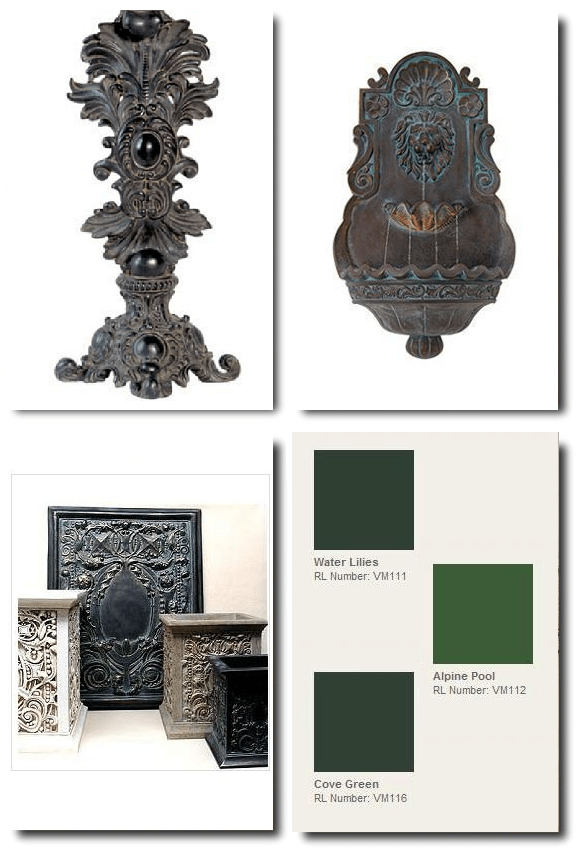
I never considered using a green wash on black until I had seen it done on an antique metal canister, so I tried it for myself. The trick with using green paint, is to paint with a damp rag in your other hand washing off the excess paint. Like the gray / beige paint in the suggestion above, it is almost more useful mixing your paint with a glaze. As the green paint dries over the black , you will get a feel of applying more or less in the areas you want aged. Like any aged furniture, you want to try to leave the green paint where rust would normally happen. I have used it on ornate chairs, and it has really pushed the value of my furniture up a notch.
4.Using Red As A Base Coat
Another technique often seen with black furniture is distressing with a red showing through as the under color. This is particularly striking with Asian furniture. This is simply accomplished by painting your furniture piece with red, and then painting your top color black. When using this technique it is not imperative that you use oil paint, but it is my preference. You can use regular latex paint, which will work perfectly. As normal, distress the furniture in worn areas.